Saturday, December 25, 2010

Holiday Cookies: My Family's Favorite Cookie

You are intrigued, right? Well this cookie goes out to my entire family but most importantly, to my late Grandma. The funny thing about this cookie is that EVERYONE in my family loves this cookie except me...actually, it's just weird. However, my Grandma made this cookie for my mom and her siblings and now my aunts make these for us, and now I am returning the favor and making it for them...and one day, I guess I will make it for my kid(s)? Yes, I will.

Now you must be wondering, what is this cookie that is at the center of your family? Mincemeat Cookie. It's special, it's delicious...and although we have them at the holiday season (that's when you can get mincemeat), we really like to eat them all year round.

If you start making this cookie, you will love it. I promise.

Ingredients

3 1/4 cups all-purpose flour
1/2 teaspoon salt
1 teaspoon baking soda
1 cup unsalted butter
1 1/2 cup sugar
3 large eggs beaten
1 9 oz. package of Borden Nonesuch Mincemeat

Directions

1) Preheat oven to 375
2) In one bowl, combine flour, salt and baking soda
3) In another bowl, cream butter, sugar until fluffy. Add eggs until smooth.
4) Stir in mincemeat to wet mixture and then gradually add flour mix. Mix super well.
5) Roll into two inch dough balls and place on cookie sheet about 2 inches apart.
6) Bake for about 10-12 minutes until slightly browned.
7) Share and Enjoy!!!

These cookies are about family and that is good enough for me. <3

Made: 12/24/10
"Posted": 12/25/10
Posted: 06/03/11

Holiday Cookies: Sugar Cookies


These are simple and classic...and easily adaptable to any situation.

Adapted from Food Network

Makes about 2 dozen cookies

Ingredients

1 1/2 cup all-purpose flour
1/2 teaspoon baking powder
1/8 teaspoon salt
1/2 cup unsalted butter
1/2 cup sugar
1 egg
1/2 tablespoon milk

Directions

1) Preheat oven to 375 degrees (after mix has been refrigerated)

2) Sift together flour, baking powder, and salt.

3) In another bowl, place butter and sugar and beat until light in color.

4) Add egg and milk and beat to combine.

5) With your mixer on low speed, gradually add flour. Wrap the dough in waxed paper and refrigerate for 2 hours.

6) Remove 1 wrapped pack of dough from refrigerator and roll it out until its about 1/4 inch thick. Becareful to not let the dough stick.

7) Form cookie shaped circles and place about at inch apart on a greased baking sheet.

8) Bake for 7-9 minutes until the cookies just BEGIN to turn brown.

9) Remove from oven. Top with red and green sprinkles (or whatever colors you fancy). Cool.

10) Share and Enjoy!


Just fun.

Made: 12/24/10
"Posted": 12/25/10
Posted: 06/03/11

Holiday Cookies: Gingersnap Cookies

These are one of my favorite holiday time cookies. However, they are so good that sometimes I am tempted to make them all year round. Just saying...

Additionally, I am not a huge proponent of using shortening while baking (yeah, it's kind of gross), but a couple of the holiday cookie recipes I use, utilize it...so yeah.

Adapted from Allrecipes

Ingredients

2 cups sifted all-purpose flour
1 tablespoon ground ginger
2 teaspoons baking soda
1 teaspoon ground cinnamon
1/2 teaspoon salt
3/4 cup shortening
1 cup white sugar
1 egg
1/4 cup dark molasses
1/3 cup cinnamon sugar

Directions

1) Preheat oven to 250 degrees
2) Sift the flour, ginger, baking soda, cinnamon, and salt into a mixing bowl. Blend well.
3) Beat together the shortening and white sugar followed by the egg and molasses.
4) Add the dry ingredients into the molasses mixture and mix well.
5) In a separate small bowl, mix together cinnamon and sugar.
6) Make 1 inch balls of dough and roll them into the cinnamon sugar mixture.
7) Place on cookie sheet about 2 inches apart.
8) Bake for about 8-10 minutes until the cookies crack slightly.
9) Share and Enjoy!

What is the holiday season without gingersnap cookies?!?

Made: 12/24/10
"Posted": 12/25/10
Posted: 06/03/11

Wednesday, December 22, 2010

Oatmeal Holiday Cookies

These are like Oatmeal Chocolate Chip Cookies but better. Only because they have Holiday M & M's instead...so that automatically makes them better. Just saying. Make these next Christmastime, your family will love you.


Ingredients

1/2 cup butter
1/2 cup packed light brown sugar
1/4 cup white sugar
1 egg
1 teaspoon vanilla extract
3/4 cup all-purpose flour
1/4 teaspoon baking soda
1/2 teaspoon salt
1 1/2 cup quick-cooking oats
1 cup M&M's

Directions

1) Preheat oven to 350 degrees
2) In a large bowl, cream together the butter, brown sugar, white sugar until smooth.
3) Beat in eggs and then add vanilla
4) In a separate bowl, combine the flour, baking soda and salt.
5) Stir the dry ingredient mixture into the creamed mixture until well blended.
6) Add in the oats and fold in the M&M's.
7) Drop by spoonfuls onto un-greased cookie sheet.
8) Bake for 10-12 minutes in the preheated oven and let cool on the baking sheet.
9) Share and Enjoy!

Yeah just make them any holiday...and add the seasonal M&M's! So much fun.

Made: 12/22/10
"Posted": 12/22/10
Posted: 06/02/11

Saturday, December 11, 2010

Mint Chocolate Crinkle Cookies


Holiday time= Cookie Time. This was my pre-cookie mania but these were really simple and super tasty. A little bit of mint extract goes a long way...

Adapted from Food.com


Ingredients

1
cup
all purpose flour
1/2
cup
unsweetened cocoa powder
1
teaspoon baking powder

1/4
teaspoon salt

1 cup granulated sugar

1/4
cup
vegetable oil

2 eggs

1/2
teaspoon v
anilla extract
1/2
teaspoon
peppermint extract
1 cup semi-sweet chocolate chips

Directions

1) Preheat oven to 350 degrees
2) In a small bowl, mix together flour, cocoa, baking powder, and salt
3)
In a large bowl, whisk together sugar, oil, eggs, and extracts until well blended.
4) Stir dry mixture into wet mixture until just combined.
5) Fold in chocolate Chips
6) Cover bowl and refrigerate for two hours (or don't...).

7) Roll cookie dough into 1 inch balls and place 1 1/2 inches apart on parchment-lined cookies sheets.
8) Bake for 11-13 minutes

9) Share and Enjoy!

These are super simple but I really liked the hint of peppermint because it was so unexpected. A perfect holiday cookie primer. :-)

Made: 12/11/10
"Posted": 12/11/10
Posted: 06/01/11

Thursday, December 9, 2010

Oatmeal Blueberry Scones


Well my secret is out. Breakfast is my favorite. If I could eat breakfast for every meal of the day, I probably would be tempted to do so. That being said, I think it makes complete sense that muffins and now scones have been a recent popular item on BOOF. However, making scones have always scared me. I realized that I needed to conquer this fear so gathered up my courage and made some scones. They were good. They had blueberries. They also had oatmeal. I really like those things. I like them even more together in the scone form.

Adapted from Epicurious

Ingredients

1 2/3 cups all-purpose flour
1/4 cup plus 2 tablespoons packed light brown sugar
1 teaspoon cinnamon
1/2 teaspoon nutmeg
1 tablespoon baking powder
3/4 teaspoon baking soda
1/2 teaspoon salt
1 1/3 cups plus 2 tablespoons old-fashioned rolled oats
1 1/2 sticks (3/4 cup) cold unsalted butter, cut into tablespoon pieces
1 Cup of Blueberries
2/3 cup buttermilk plus additional for brushing

Directions

1) Put oven rack in middle position and preheat oven to 425°F.

2) Sift together flour, 1/4 cup brown sugar, cinnamon, baking powder, baking soda, and salt.

3) Add 1 1/3 cups oats and mix together with your hands.

4) Add butter and and work until mixture resembles coarse meal with some small lumps.

5) Transfer to a bowl and add buttermilk and stir with a fork until a dough just forms.

6) Gently knead on a floured surface a few times.

7) Pat into a 9-inch square (1/2 inch thick). Cut into 9 (3-inch) squares. Cut each square diagonally to form 2 triangles. (Or just make approximately 18 two inch blobs.

8) Transfer to an ungreased baking sheet lined with parchment paper.

9) Brush with buttermilk and bake until golden brown, about 16 minutes.

10) Share and Enjoy!

These were raved about. I will make scones again. They are the best when the just come out of the oven and still have a little warmth to them. Ugh, I want these with coffee right now. Like this second. Sigh.

Made: 12/09/10
"Posted": 12/09/10
Posted: 06/01/11


Wednesday, December 8, 2010

Cranberry Lime Muffins

Apparently I go on sprees. Cookies. Muffins. Pasta. Yeah, it's a little weird. I guess I'm consistent though? These bad boys are tasty and tart and a perfect accompaniment to a cup of coffee and the morning paper...for those of us who still read the paper and do the crossword. :-)

Adapted from Joy the Baker

Ingredients

7 Tablespoons unsalted butter
1/3 cup whole milk
1 large egg
1 large egg yolk
1 teaspoon vanilla extract
Zest of 1 lime
1 1/2 cups flour
3/4 cup sugar
1 1/2 teaspoons baking powder
3/4 teaspoon salt
1 1/2 cups fresh cranberries
1/4 cup granulated sugar for topping

Directions

1) Put a rack in the upper third of the oven and preheat oven to 350 degrees F.

2) Line muffin pan with paper or foil liners or grease muffin pan

3) Melt and brown butter in a small saucepan over medium heat. Watch carefully and remove from heat.

4) Whisk milk, egg, yolk, vanilla and lime zest until combined. Add the brown butter and combine.

5) Whisk together flour, sugar, baking powder and salt in a medium bowl

6) Add milk and butter mixture all at one and stir gently to combine.

7) Gently but thoroughly fold in the cranberries.

8) Divide the batter among muffin cups and spread evenly and sprinkle with granulated sugar.

9) Bake for about 18-20 minutes and a toothpick comes out clean, about 18-20 minutes.

10) Cool in pan on a rack for 15 minutes then remove from the pan.

11) Share and Enjoy!

These are really quite good especially for those who like tart flavored things. I really like the nutty flavor that the browned butter brought to the muffin and the lime provided the perfect citrus balance. I will make these again soon. Yes, yes I will.

Made: 12/08/10

"Posted": 12/08/10

Posted: 06/01/11

Tuesday, December 7, 2010

Pumpkin Walnut Butterscotch Muffins


Apparently I was feeling like muffins on this particular day. I also felt very "autumnly" (don't judge me, I know it is not a word) and decided that I wanted to make some sort of pumpkin muffin because all of the pumpkin cookies that I had made prior went over extremely well. For some reason in my mind, both walnuts and butterscotch seemed like they would go together with pumpkin and trust me, they did.

Adapted from Food.com

Ingredients

2 cups sugar
1/2
cup
vegetable oil
3 eggs
1 1/2 cups canned pumpkin
1/2 cup water

2 cups of flour
1 1/2 t
easpoon baking powder
1 teaspoon baking soda
1/2 teaspoon cloves
1 teaspoon cinnamon
1/2 teaspoon nutmeg
1 teaspoon salt
1 1/2 cups of raisins
1 cup of butterscotch chips

Directions

1) Preheat oven to 400 degrees
2)
Mix together sugar, oil, eggs, pumpkin and water in a large bowl.
3) Sift together all dry ingredients and add to mixture.

4) Fold in raisins and walnuts.

5) Place in greased muffin tins and bake at 400° for 15 minutes until toothpick comes out clean.
6) Share and Enjoy!!!

Yeah when fall comes back around, please make these. Do it for me as a favor. You will not regret it.

Made: 12/05/10
"Posted": 12/07/10
Posted: 06/01/11

Monday, December 6, 2010

Oatmeal Blueberry Applesauce Muffins


I was tempted to make these eggless. Next time, I think I will. Nevertheless, this a very tasty simple blueberry muffin with a hint of apple flavor that I think you will enjoy as much as I did.
Additionally, if you are not a blueberry person (which is just odd), I would not be oppose to adding whichever berry you love the most. And if you are very feeling very daring, add more than one type of berry! GASP! I think summer requires it...

Adapted from Joy the Baker

Ingredients
1 1/4 cups whole wheat flour
1 1/4 cups oats
1 tsp baking powder
1/2 tsp baking soda
1/4 tsp salt
1/2 tsp cinnamon
1 cup unsweetened applesauce
1/2 cup low-fat buttermilk
1/2 cup firmly packed brown sugar
2 tbsp canola oil (I used the almond oil I had on hand)
1 large egg, lightly beaten
3/4 cup blueberries (fresh or frozen)

Directions

1) Grease and flour your muffin pan. (You could use muffin liners but I personally don't think muffins should have liners. Cupcakes, yes. Muffins, no...but that is just me!)

2) In a large bowl combine all of your dry ingredients: flour, oats, baking powder, baking soda, salt and cinnamon.

3) In a medium bowl combine applesauce, buttermilk, sugar, oil and egg.

4) Make a well in your dry ingredient mixture and add applesauce mixture. Stir until just moist.

5) Fold in blueberries.

6) Fill muffin cups 2/3 full.

7) Bake for 16-18 minutes or until a toothpick comes out clean.

8) Share and Enjoy!

I am going to be completely honest with you and I think these came a out a little heavier than I would have liked. Everyone still loved them but I also think I would maybe do away with the egg (as I had previously mentioned) and just add more apple sauce to be a binding agent. Or maybe even yogurt....hmm. I like where this is going. So yeah, still make them because people really like their blueberry muffins. :-)

Made: 12/05/10

"Posted": 12/06/10

Posted: 06/01/11

Sunday, December 5, 2010

Pecan Pie

My Dad's most favorite dessert in the world is Pecan Pie. After making this for him, I told him that if I knew how easy Pecan Pie was to make, I would've made it a long time ago for him! Even if this Pecan Pie didn't turn out as well as it did, he still would've loved it because he loves Pecan Pie just that much. Also, he is my dad so I believe that I can do no wrong in his eyes? Or something like that...

Adapted from Epicurious

Oh and please excuse me as I use store bought crusts. Apparently, my grandma did it and she was a boss, so I will follow suit and do it too. HUMPH.

Ingredients

Crusts

  • 3/4 stick unsalted butter
  • 1 1/4 cups packed light brown sugar
  • 3/4 cup light corn syrup
  • 2 teaspoon pure vanilla extract
  • 1/2 teaspoon grated orange zest
  • 1/4 teaspoon salt
  • 3 large eggs
  • 2 cups pecan halves (1/2 pound)

  • Directions

    1) Preheat oven to 350degrees with baking sheet on middle rack
    2) Place crust on baking sheet for 8-10 minutes until slightly browned
    3) Meanwhile, melt butter in a small pan over medium heat and add brown sugar while whisking until smooth.
    4) Remove from heat and whisk in corn syrup, vanilla, orange zest and salt.
    5) Lightly beat eggs in a medium bowl and then whisk in the corn syrup mixture thing.
    6) Place pecans in a pie shell and pour corn syrup mixture evenly over them.
    7) Bake on hot baking sheet until filling is set, 50 minutes to 1 hour.
    8) Cool. For real. Cool.
    9) Share and Enjoy! (oh and throw some ice cream on that bad boy!)

    My dad loved it which was to be expected. However, I also had a slice and enjoyed it and I am not the hugest proponent of pecan pie, so I think that is saying something?!? If you have a pecan lover in your life, just make it for them because they will be greatly appreciative...and it is easy!

    Made: 11/24/10
    "Posted": 12/05/10
    Posted: 06/01/11

    Saturday, December 4, 2010

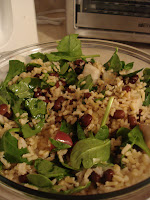
    Brown Rice Casserole


    Oh Hey Heidi. Thanks for continual vegetarian deliciousness. I really do appreciate it.

    Sincerely,
    -Karri


    I am not sure why I haven't made this since my original adventure because it was so delicious...and got better by the day. I believe that I will have to get on that soon. However, although this dish is vegetarian, you obviously don't need to be one to enjoy it but if you do insist, I think you brown up some ground beef or turkey and it would work well with the rest of the ingredients.

    Adapted from 101 Cookbooks

    Ingredients

    1/2 pound of sliced and cleaned mushrooms ( I just used a pint)
    1 large onion
    3 gloves of garlic
    3 cups of cooked brown rice
    2 large eggs
    1 cup of feta cheese
    1 cup of black olives
    2 cups of spinach
    1/2 teaspoon salt
    1/3 cup of parmesan cheese

    Directions

    1) Preheat oven to 350 degrees.
    2) Boil and cook brown rice
    3) Heat a medium saucepan with a dab of oil and oil a 9x13 or 9x9 (just depends on how much you make) baking pan.
    4) Add mushrooms to the pain and saute with olive oil.
    5) Add onions to the pan and cook for another 4-5 minutes until translucent
    6) Add in garlic to the pan and stir for another minute or so.
    7) Add Spinach and mix until they begin to wilt.
    8) Turn of the heat and add brown rice to the pan and mix well.
    9) In a separate bowl, mix together eggs, cheese and salt.
    10) Combine the brown rice mix, black olives and the egg mixture, stir well and then spread evenly in your baking dish
    11) Sprinkle with Parmesan cheese and cover with foil and place in the oven for 30 minutes.
    12) Remove foil and bake for another 20-30 minutes until a pretty golden brown on the outside border.
    13) Top with remaining cheese and fresh herb of your choice
    14) Share and ENJOY!

    Yeah, I need to make this again. Warms my heart just thinking about it. Also, another cool thing about this dish is that you can make it and really cater it to your personal liking...add whatever you would like, it is sure to be delicious.

    Made: 11/21/10
    "Posted": 12/04/10
    Posted: 06/01/11

    Friday, December 3, 2010

    Peanut Butter Chocolate Chip Cookies


    Sometimes I read the recipes on the side panels of the package of the flour, or the nestle chips or whatever. This is precisely what happened in this instance. The side package of your standard Gold Medal All-Purpose Flour featured this tasty Peanut Butter Chocolate Chip recipe. These are quite simple and good and especially a treat for the peanut butter lover...and we all have a few of those in our lives.

    Ingredients

    1/2 cup of butter
    1/2 cup of cream peanut butter
    1/2 cup of granulated sugar
    1/2 cup of brown sugar
    1 egg
    1 1/4 cups all-purpose flour
    1/2 teaspoon baking powder
    1/2 teaspoon baking soda
    1/4 teaspoon salt
    1 cup of semisweet chocolate chips

    Directions

    1) Preheat oven to 350 degrees

    2) Cream butter, peanut butter, sugars and egg. Beat until fluffy.

    3) Whisk the flour, baking powder, soda and salt together.

    4) Add the flour to the butter/egg mixture and beat.

    5) Fold in the chocolate chips

    6) Roll cookie dough into approximate two inch balls and place on baking sheets.

    7) Bake for 10-12 minutes.

    8) Share and Enjoy!

    I really like these cookies. I mean what is there to not like about peanut butter and chocolate?

    Made: 11/20/10
    Posted: 12/3/10
    Actually Posted: 05/31/11

    Thursday, December 2, 2010

    Oatmeal Scotchies

    These cookies will transform your life. You think I am kidding but I am COMPLETELY serious. For real though. These cookies are just so delicious and so simple that I wish that I had been consuming them my entire life (although my waistline would have not been too happy about it).

    Make these. Just do it. You will not regret your decision. I PROMISE.

    Side Note: I usually half the usual recipe because If I made the full recipe, I would have about four dozen cookies and would be tempted to eat every last one of them. Seriously.

    Ingredients

    3/4 Cup Flour

    1/2 teaspoon baking soda

    1/4 teaspoon salt

    1/2 teaspoon cinnamon

    1/4 teaspoon nutmeg

    1/2 cup of butter

    1/2 cup of brown sugar

    1/2 cup of granulated sugar

    1 egg

    1/2 teaspoon vanilla extract

    1 1/2 cup of Old-Fashioned/Quick Cooking Oats

    1 Cup of Butterscotch Chips

    Directions

    1) Preheat oven to 350 degrees

    2) Combine flour, baking soda, salt, cinnamon and nutmeg in a small bowl and set aside

    3) Beat butter, granulated sugar, brown sugar, eggs and vanilla extract in a large bowl

    4) Gradually beat in flour mixture over the course of 2-3 minutes

    5) Stir in Oats and Butterscotch Chips

    6) Round into approximate two inch balls and place them onto an baking sheet

    7) Bake 7-8 minutes for chewy cookies

    8) Cool on baking sheets for a couple of minutes...or just eat them immediately. your choice. i can't resist.

    9) Share and Enjoy!!!!

    Made: 12/02/10
    Posted: 05/31/11

    Wednesday, December 1, 2010

    White Chocolate Craisin Cookies


    Hi Friends.

    It's been a while. Here is a repeat favorite that is always a crowd pleaser.

    Oh did I mention it was super easy?


    Ingredients

    1/2 cup (1 stick) unsalted BUTTER

    1 cup packed light brown sugar (or dark...if you prefer)

    2 Tablespoons milk

    1 large egg

    1 teaspoon vanilla extract

    1 3/4 cup all-purpose flour

    1/2 teaspoon baking soda

    1/8 teaspoon salt

    1 cup white chocolate chips

    1 cup Craisins


    Directions

    1) Beat butter, sugars, eggs and vanilla for about 5 minutes. In another bowl, combine flour, baking soda, baking powder, and salt. Add to butter mixture 1 cup at a time.

    2) Fold in White Chocolate Chips and Craisins

    3) Round in 2 inch balls and bake for 8-10 minutes at 350 degrees F.

    4) Share and Enjoy!

    These are simple and delicious. Make them from your friends. Make them for your non-friends and they will want to become your friends. I promise.


    Made: 12/08/10
    Posted: 05/31/11

    Tuesday, November 9, 2010

    Chickpea Spaghetti


    one day back around the time of the new york city marathon, deb from smitten kitchen made this wonderful pasta filled with chickpeas, veggies and all around deliciousness. luckily for me, I had most of these items in my fridge and with some spinach on the brink of going bad, I decided to put my own little touch on this gem.

    as an "athlete", i am always looking for ways to eat deliciously while being healthy all at the same time. this bad boy definitely falls into that category, so I highly recommend this quick and easy recipe to any person...whether an athlete or not. ;-)

    Adapted From: Smitten Kitchen

    Ingredients
    15 ounces canned chickpeas, rinsed and drained or about 2 cups, freshly cooked chickpeas
    1/2 cup vegetable stock (or chicken stock) stock
    5 tablespoons extra-virgin olive oil
    1 medium onion, thinly sliced
    4 cloves garlic, thinly sliced
    Pinch chile flakes ( I use red pepper)
    1 Cup of Grape Tomatoes (Halved)
    2 Cups of Uncooked Spinach
    Salt to taste
    1 pound spaghetti (or angel hair pasta)
    Freshly grated Parmesan cheese to taste

    Directions

    1) Cook Pasta and drain accordingly

    2) Heat olive oil in a large sauce pan

    3) Saute garlic and onions, until onions are translucent (4-5 minutes)

    4) Add spinach to garlic and onions and cook until spinach begins to wilt. Then add tomatoes, veggie stock and chile pepper flakes and cook for another 3-4 minutes.

    5) Remove mixture in saucepan from heat and add it to the spaghetti and mix well. Season with salt and pepper accordingly.

    6) Top with fresh basil and parmesan cheese.

    7) Share and ENJOY!

    Notes: When you add the veggie(chicken) stock, you can simmer it up to 20 minutes, depending on how much you want the flavor to seep it. I thought it was delicious without all the additional time. Additionally, the original recipe also had pancetta in it, so if you are a meat-eater, there is your special protein! I would also consider using maybe arugula or swiss chard instead of spinach, just to mix up the flavor profile of the dish. Nevertheless, it was super delicious and very quick to make. I am sure that I will be making this again!

    Made: 11/09/10
    Posted: 01/30/11

    Saturday, November 6, 2010

    Cauliflower Bean Salad


    Sometimes thing just come together and they were better then you expected. This is precisely what happened with this dish. I was inspired by a dish that I saw on Deb's Smitten Kitchen and it just morphed it into my own tasty meal. This is a dish I really recommend trying and although it doesn't seem that it would be that filling, it most definitely is.

    Adapted from Smitten Kitchen

    Ingredients:

    1/2 cup olive oil

    2 tablespoons fresh lemon juice

    1 tablespoon red wine vinegar

    1 1/2 tablespoon of honey

    1 1/2 teaspoons salt

    1/2 teaspoon ground black pepper

    1 medium head of cauliflower, trimmed, cut into small florets

    1 (15-ounce) can kidney beans, drained

    A Bundle of Asparagus (Anywhere between 1/2-1 pound)

    2 teaspoons chopped parsley (or herb of your choice)

    1/2 cup crumbled goat cheese

    1) Preheat oven to 400°F.

    2) Toss cauliflower florets and asparagus with 1/4 cup of olive oil and season well with salt and pepper.

    3) Spread on a baking sheet and roast until edges are dark and caramelized, about 15-20 minutes, stirring once or twice.

    4) While cauliflower and asparagus is browning beautifully, combine remaining olive oil, vinegar, and honey. Stir over medium heat just until fragrant, about 1 minute. Cool.

    5) Whisk lemon juice, salt, and pepper in small bowl. Add to olive oil, vinegar and honey mixture.

    6) Combine roasted, still warm cauliflower and asparagus. Add the cheese.

    7) Season salad with salt and pepper to taste.

    8) Share and Enjoy!

    So yeahhhh, go make this. you wont regret it. I promise.

    MADE: 11/06/10
    Posted: 01/18/11

    Thursday, November 4, 2010

    Apple Spice Cake


    i love apples (peeled). i love apple (pie). i don't love apple (juice). i love hot apple (cider). i love apple (sauce). i love (baking) with apple (sauce).

    Yes, it is true. I have a deep love for many things apple (except apple juice...i actually hate that stuff...it is weird but I won't get into it). When I first started really getting into my baking and I found out that BOOF buddy Mits did not eat eggs, I was unsure of what to use as a substitute. I found many numerous recipes that used all of these crazy supplements, but I wanted something more natural...and something that I could eat and use on a regular basis. Enter: Apple Sauce.

    It has been a love-love relationship ever since and I have been able to create some pretty tasty things that are eggless which also makes them better for ya! Unfortunately this recipe has eggs in it, but I am on my way to finding a way to make it eggless but not too moist...that is the problem my friends.

    I had never made an apple spice cake before but I have definitely eaten my fair share, but when I saw this recipe from Deb at Smitten Kitchen, I knew that I had to make this. Probably more than once. This recipe is super easy and super delicious and I chose to put the icing on it, but it works wonderfully as a breakfast cake minus the icing. So yummy. So Autumn. So Perfect.

    Ingredients
    For the Cake:
    2 cups all-purpose flour
    2 teaspoons baking powder
    1/2 teaspoon baking soda
    1/2 teaspoon salt
    3/4 teaspoon cinnamon
    1/2 teaspoon ground ginger
    1/8 teaspoon ground cloves
    1 stick unsalted butter, softened
    1 cup packed light brown sugar
    1 teaspoon pure vanilla extract
    2 large eggs
    1 1/2 cups unsweetened applesauce

    For the Icing:
    5 ounces cream cheese, softened
    3 tablespoons unsalted butter, softened
    1/4 teaspoon pure vanilla extract
    1 cup confectioners sugar
    1/2- 1 teaspoon teaspoon cinnamon ( I use the full whopping 1 teaspoon...cinnamon just adds so much delicious flavor!)

    Directions
    1) Preheat oven to 350 degrees.
    2) Butter baking dish ( I recommend 8 or 9 inch square)
    3) MAKE the CAKE: Whisk together flour, baking powder, baking soda, salt, and spices.
    4) Beat butter, brown sugar, and vanilla with an electric mixer until fluffy, 2 to 3 minutes.
    5) Add eggs one at a time, beating well.
    6) Add in apple sauce and beat well.
    7) Spread batter in pan and bake for about 35-40 minutes until golden-brown. Do the toothpick Test!
    8) Cool for about 15-20 minutes and then loosen the cake before turning it upside down, so it comes out of the pan to cool some more. DO not forget this step...I may have...
    9) MAKE the ICING: Beat cream cheese, butter, and vanilla with an electric mixer at high speed until fluffy.
    10) Sift confectioners sugar and cinnamon over cream cheese mixture, then beat at medium speed until incorporated.
    11) Spread frosting over top of cooled cake.
    12) SHARE and ENJOY

    I really enjoyed this cake and I was surprised at how easy this was. I find this cake hard to judge because it is so moist, so just try and use your best judgment when removing it from the oven. Remember, a little too moist never hurt anyone. ;-)

    Made: 11/04/10
    Posted: 01/13/11

    Pumpkin Chocolate Chip Cookies


    These are just almost the same exact recipe except with choco chips...and powdered sugar. I think those two ingredients might just make them even more delicious than the butterscotch ones. Who knew that was even possible.

    Well, Joy the baker knew. That's who gave me the idea. She's such a smarty pants.

    Adapted from Joy the Baker

    Ingredients

    2 cups all-purpose flour

    1 1/2 teaspoons baking powder

    1 teaspoon soda

    1/2 teaspoon salt

    1 teaspoon ground cinnamon

    1/4 teaspoon freshly grated nutmeg

    1/4 teaspoon ground cloves

    2 eggs

    1 cup sugar

    1/2 cup canola or corn oil

    1 cup canned pumpkin

    1 teaspoon vanilla extract

    1 cup chocolate chips


    Directions

    1) Preheat the oven to 325 degrees F.

    2) Line two baking sheets with aluminum foil

    3) Stir the flour, baking powder, baking soda, salt and spices together in a medium bowl and set aside.

    4) In a large bowl, using an electric mixer on medium speed, beat the eggs and sugar until smooth and fluffy.

    5) Once done mixing well, scrape the sides of the bowl.

    6) On low speed, mix the oil, pumpkin, and vanilla until blended.

    7) Mix in the flour mixture to incorporate it. Mix in the chips.

    8) Use a 1/4 cup or your hands to drop dough balls about 2 1/2 inches apart on the cookie sheets.

    9) Bake for 15-17 minutes and do the toothpick trick. Make sure the top feels firm before you remove them from the oven.

    10) Cool for about 5-7 minutes and then top with powdered sugar (don't be sparing)

    11) Share and Enjoy!

    I am so happy that all my buds at school actually like pumpkin with the exception of a few. Anything of the pumpkin variety is quickly eaten up and these were no exception. Super tasty. Super fluffy. Super amazing. Go make these, please.

    Made: 11/04/10
    Posted: 01/18/11

    Saturday, October 30, 2010

    Lemon Bars


    I had never made homemade lemon bars but after making these, I thought to myself, "Why Would anyone not make these homemade?". This is by far one of the simplest things I have ever made and it was so delicious too. I oddly made these for halloween...i'm not quite sure why but I did and everyone seemed to enjoy them.

    Adapted from: Ina Garten, Barefoot Contessa

    For the Crust
    1/2 pound unsalted butter, room temperature
    1/2 cup of granulated sugar
    2 Cups of Flour
    1/8 teaspoon of kosher salt

    For the filling:
    6 extra-large eggs
    3 Cups granulated sugar
    2 tablespoons of fresh grated lemon zest (about 4-6 lemons)
    1 cup of freshly squeezed lemon juice (from those zested lemons)
    1 cup of flour
    Confectioners' sugar for dusting on top
    Directions

    1) Preheat the oven to 350 degrees F.

    2) For the crust, cream the butter and sugar until light in the bowl of an electric mixer

    3) Combine the flour and salt and, with the mixer on low, add to the butter until just mixed.

    4) Dump the dough onto a well-floured cutting board and gather into a ball. Flatten the dough with floured hands and press it into a 9 by 13 by 2-inch baking sheet, building up a 1/2-inch edge on all sides. Chill for 30 minutes.

    5) Bake the crust for 15 to 20 minutes, until very lightly browned. Let it cool but leave the oven on.

    6) For the filling, whisk together the eggs, sugar, lemon zest, lemon juice, and flour. Pour over the crust and bake for 30 to 35 minutes, until the filling is set. Let cool to room temperature.

    7) Dust with confectioner's sugar.

    8) Share and ENJOY!

    I really loved these lemon bars and they are so simple. If bringing them to a friend's, I recommend cutting them into little "bars". Makes it easier to serve and eat.

    Made: 10/30/10

    Posted: 01/12/10

    Thursday, October 28, 2010

    Sweet Potato Pie andddd CRUST!


    As you will be able to tell soon, if you already were not able to, I really enjoy Joy the Baker's Blog. She is super legit, funny and her recipes are very easy to follow.

    Sweet Potato Pie is a family thanggg where I come from, but I knew that if I had any intention of making Sweet Potato Pie for the upcoming holidays, I needed to start working on perfecting it now. I took to the Joy the Baker to find a basic recipe for Sweet Potato Pie, and then I proceeded to call my aunts to find out if this is essentially what they do...it was.

    However, to be super ambitious, I decided to make the crust too. I had never made the bottom to a pie, so I thought that I would give it a go and although it is much more of a time consuming process, at least you know the ingredients are real and not all of that processed mumbo jumbo.

    Ingredients for the Crust

    1 1/2 cups all-purpose flour

    3/4 teaspoon salt

    2 Tablespoons sugar

    1/8 teaspoon baking powder

    1/4 cup (4 Tablespoons) frozen butter that has been grated on a cheese grater

    1/4 cup vegetable oil

    1 Tablespoon cream cheese, at room temperature

    2 Tablespoons cold milk

    Directions for CRUST

    1) Whisk together (in a medium sized bowl) flour, salt, baking powder and sugar.

    2) Add frozen butter that has been grated on a cheese grater and tablespoon of cream cheese.

    3) Time to get "dirty"- work the cream cheese and butter into the flour mixture, breaking the butter and cream cheese up until they’re in well incorporated into the flour. A little crumbly...

    4) Combine the milk and oil.]and add to the flour/butter mixture. With a fork, begin to combine the ingredients, making sure that all of the flour mixture is introduced to the liquid.

    5) Once mixed (doesn't have to be perfect) and place it into a clean 9-inch pie plate. With your fingers, press the dough evenly into the bottom of the pie plate and up the sides. Molt to the pie plate as evenly as possible but don't worry about your finger indentations.

    6) Place the prepared crust in the freezer while you preheat the oven and prepare your filling.

    Ingredients for Sweet Potato Pie Filling

    2 cups mashed cooked sweet potatoes

    3/4 cup packed brown sugar

    1/2 granulated sugar

    1/8 teaspoon of cloves ( I switched this up from the coriander in the original recipe)

    1/2 teaspoon freshly grated nutmeg

    1/2 teaspoon cinnamon

    1/8 teaspoon salt

    1/4 cup (1/2 stick) butter, melted

    2- 5oz cans evaporated milk (1 1/4 cups evaporated milk)

    3 large eggs

    1 Tablespoon vanilla

    Directions for Sweet Potato Pie Filling

    1) Boil two medium sweet potatoes in their jackets in a covered pot over moderate flame, until sweet potatoes are very soft and tender. Make sure a knife can go through a potato very quick and smooth.

    2) Drain your potatoes and let them cool.

    4) When cool enough to handle, peel potatoes, cut into chunks and place in a large bowl. Mash potatoes thoroughly with a potato masher. NO lumpssss.

    5) Measure 2 cups and put in a medium sized pot with the packed brown sugar, nutmeg, cinnamon, cloves , salt, the 1/2 stick butter, and one 5 oz can of evaporated milk.

    6) Cook on low flame for about 5 minutes, whipping with a wire whisk until butter and brown sugar are melted down and mixture is well blended, smooth and starts to bubble. Remove from fire and let cool in pot.

    7) In a medium sized bowl, beat the three eggs with a fork. Add the second 5oz can of evaporated milk, granulated sugar and vanilla to the eggs and continue beating until creamy.

    8) Pour the cooled sweet potato mixture from pot into a large bowl. Stir in the egg mixture. Blend thoroughly with a whisk and pour into your crust.

    9) Preheat oven to 450 degrees with a cookie sheet inside.

    10) After the crust is heated, pour the filling into the pie shell and place it onto the cookie sheet.

    11) Bake at 450 for ten minutes and then turn your oven down to 325 and bake for 50minutes-1hr. The edges and the center will be slightly raised but shake to make sure the center is set.

    12) Remove from oven. Let cool on a wire rack for 1 hour before serving.

    13) SHARE and ENJOYYY

    Things I have learned: the first time takes the greatest amount of time. As I continued to make this recipe for Thanksgiving and Christmas, my speed of preparation increased greatly (I guess that is true for every recipe). Additionally, this is super delicious and completely worth the time. I will admit that I started using the pre-made crusts for the holiday season which obviously cut down on the time and was just as delicious. Sorry, the pre-made crusts win out this battle for me. I heavily recommend the "Oronoque Orchards" brand of pie crust. Gah, I want some pie like now...OH and this can be gluten-free using a gluten free pie crust!

    MADE: 10/28/10, 11/24/10, 12/24/10
    Posted: 01/12/11

    Tuesday, October 26, 2010

    White Chocolate Macadamia Nut Cookies


    Oh Hey Joy. I made another one of your delicious treats. I love that browned butter thing you told me to do because it has done magical things for the baked goodies coming out of my kitchen. Thanks. you're the best.

    Needless to say, I baked something delicious from Joy the Baker. This standard White Chocolate Macadamia Cookie was definitely taken to new heights with the addition of browned butter. I've been told that it adds a "nuttiness" flavor and frankly, i just thought the people telling me this were a little nutty. However, I tried it and I have to agree...Browned Butter is the way to go.

    Adapted from: Joy the Baker

    Ingredients

    1/2 cup (1 stick) BUTTER (and only BUTTER)

    1 cup packed light brown sugar (or dark...if you prefer)

    2 Tablespoons milk

    1 large egg

    1 teaspoon vanilla extract

    1 3/4 cup all-purpose flour

    1/2 teaspoon baking soda

    1/8 teaspoon salt

    1/2 coarsely chopped macadamia nuts

    1 cup white chocolate chips (Ghiradelli just tastes better)

    Directions

    1) Preheat oven to 350 degrees F.

    2) In a medium saucepan melt the butter, swirling and stirring the butter until nicely browned bits appear in the bottom of the pan (about 5-7 minutes).

    3) Once the butter is browned, remove pan from heat and set aside to cool.

    4) Meanwhile, in the bowl of a stand mixer add the brown sugar and slightly cooled butter. Beat on medium speed for about 2 minutes.

    5) Add egg and beat for one more minuteeeee.

    6) Add milk and vanilla extract and beat to incorporate.

    7) Turn the mixer off, scrape down the sides of the bowl and add the dry ingredients all at once.

    8) Incorporate the dry ingredients until just mixed in and fold in the chopped nuts and white chocolate chips.

    9) Scoop two teaspoon sized balls onto a lined baking sheet.

    10) Bake for 9-11 minutes or until cookies are deliciously golden.
    Cool.

    11) Share and Enjoy!

    Well, I love this recipe. I love that it is very easy and that simple of step of browning the butter adds so much more flavor. I also love the size of the cookies...I hate a flat cookie (unless it is a "snap" and I hate a hard cookie but this cookie is perfectly bite size and filling. However, I can not promise that you won't go for more than one...

    Made: 10/26/10

    Posted: 01/11/11